Introduction: What is Blogging?
Blogging is a term refering to a web logs, which is a collection of online dated entries describing news on a certain subject. Blogging is an essential part of any organization’s new media strategy and a well-kept, frequently updated blog can catalyze marketing campaigns already underway. In addition, the categorization power of blogs allows for resources to be accessible in a way that filters signal from noise.
Wordpress
For this first blogging tutorial, we will be working with the Wordpress blogging platform. An advantage of wordpress is that the Wordpress organization offers both the ability to host on their servers, or the option of hosting their software on your servers.
Other Platforms
Most other blogging platforms borrow concepts from Wordpress’s publishing
model. Specifically, the concept of a page versus a post. Wordpress
considers a page to be a static web page that rarely changes and has an
easily-accessible url. An example of this is an /about/ page, which lists
what the entire site is about and may be irregularily updated with links to
features. On the other hand, a post is a time-sensitive entry, and is usually
found with a date in the url, such as: /blog/2012/03/08/some-post. Posts will
show up in people’s newsfeeds, and typically on the front page of the site.
Although pages and posts can both have categories, it is more typical to only
categorize a post.
Administrating your Dynamic Site
At its heart, all a blog is a dynamic website. Like all dynamic websites, this website is editable using a normal web-browser. In order to protect against anonymous, un-verified edits, users are typically given administration access. The amount of access given to a user account depends on the role of the user. For example, a user with an author role may not edit or delete the posts of others, but a user with an editor role may. The admin role always has full access to the site (and can grant roles to other users) so there should always be a textual account of who has admin roles on a given site.
Logging in and Administrating
Logging in
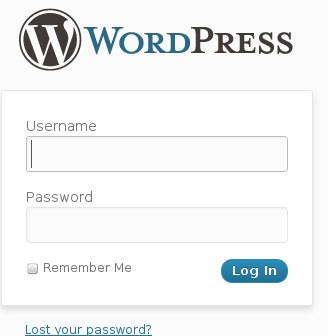
Log into your wordpress admin site by going to http://<yoursite>/wp-admin1
where <your site> is your domain name, such as example.com. Enter your
username and password and click Log In to log in.
The Admin Menu
Once you are logged in, you will be greeted with an admin menu:
At this menu, you will want to click on Posts. This will list all of the blog
posts on the site:
Creating, Previewing, Publishing, and Deleting Posts & Pages
Creating a New Post
To create a post, click on the Add New link on the Posts menu. You will be
presented with a web form similar to this one:
Adding Media to your Post
To add images or other media to the post, click on the Upload button between
the Title field and the Content textarea. You will be asked to upload your
files in a menu such as this one:
When you click on Browse Files, your browser will open a filebrowser which
you can use to navigate around the files in your computer to find the media you
need. In this example, an image is being selected for uploading to the site
from the ubuntu filebrowser:
Once the image is uploaded, you can add textual details and metadata about the image. It is important to input some metadata so that Google can read the page well. It is also important to input metadata so that media organization doesn’t grow into an extreme burden. Metadata also allows you to add a caption to the image, as well as changing the image alignment and size:
Once you are satisfied with your image details, you may insert it into the post
by clicking on the Insert into Post button. You may also make the image into
a Feature Image which will be used to represent the blog in menus and post
listings:
Publishing your Post
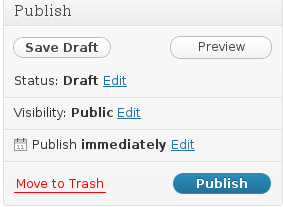
To publish your post, click on the Publish button located to the right of
your post title and content:
This menu also contains a Preview button which will display the page on the
site without publishing it to the public. It is a best practice to preview your
new post before publishing it to the main site (some organizations / blogging
platforms require this).
Changing the post time
Notice that the Publish Menu also contains an option Publish Immediately
which is bolded. By editing this field, you can change the publish time of your
post and defer posting the article to a later date and time. This is useful for
writing a series of posts and publishing them over a consistent, frequent time.
Deleting a Post
If you want to remove a post, click on the Move to Trash link in red on the
Publish Menu. The site will confirm that you want to delete the post, click
‘yes’ to delete the post.
Related Tutorials
- Managing Events in Wordpress — Yellow Belt
Additional Resources
Footnotes
user’s information.
-
Variables listed in brackets (
<like this>) should be replaced with the ↩


